Bootly is a modern Cross-Platform GUI Tool for Android Rom Development
 Installation & Usage
For Developers Cross Platform (Source Code)
git clone https://github.com/Haris16-code/Bootly.git
cd Bootly
pip install -r requirements.txt
python main.py
For Windows Users (Standalone EXE)
- Download the Bootly-v1.2-windows-x64.zip from the Releases page.
- Run Bootly-v1.2-windows-x64.exe.
Source Code : https://github.com/Haris16-code/Bootly/
Unpacking and Repacking Guide
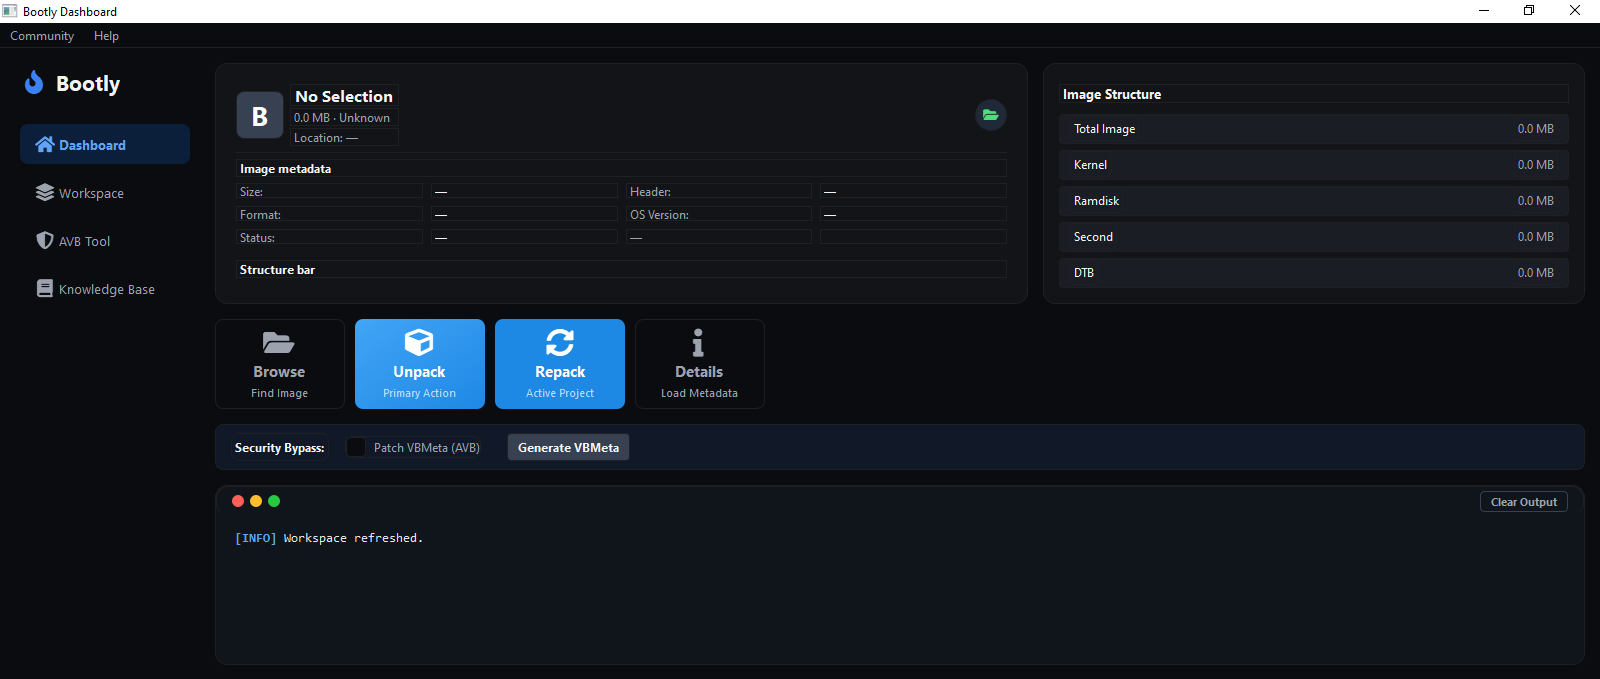
1. Launch Bootly
After running Bootly, it will automatically create three folders in its directory:
input/- Place your boot.img or recovery.img files hereoutput/- Your repacked images will be saved hereworking/- Temporary working directory
2. Select Your Image File
- Click the Browse button to open the file picker.
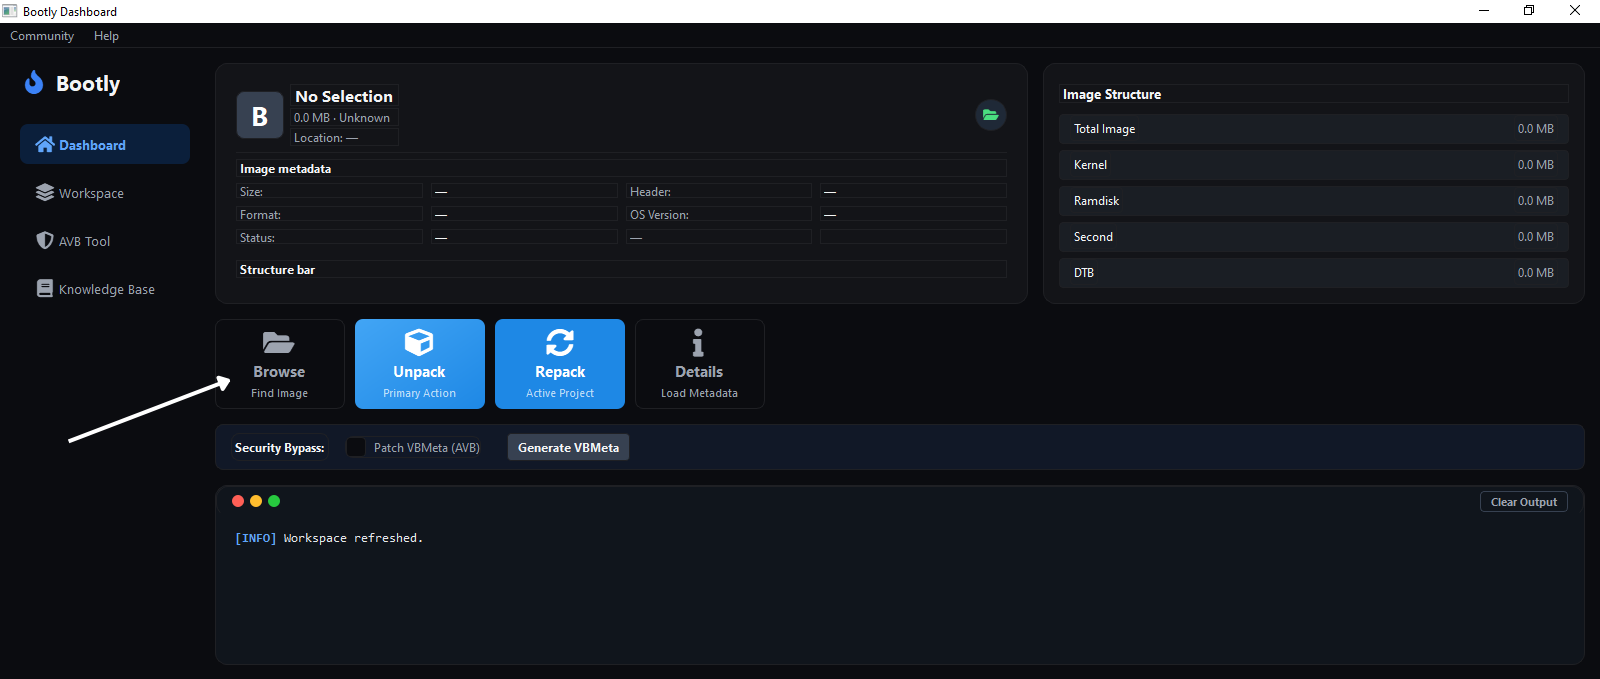
- The file manager will appear. Navigate to your
boot.imgorrecovery.imgfile and select it.
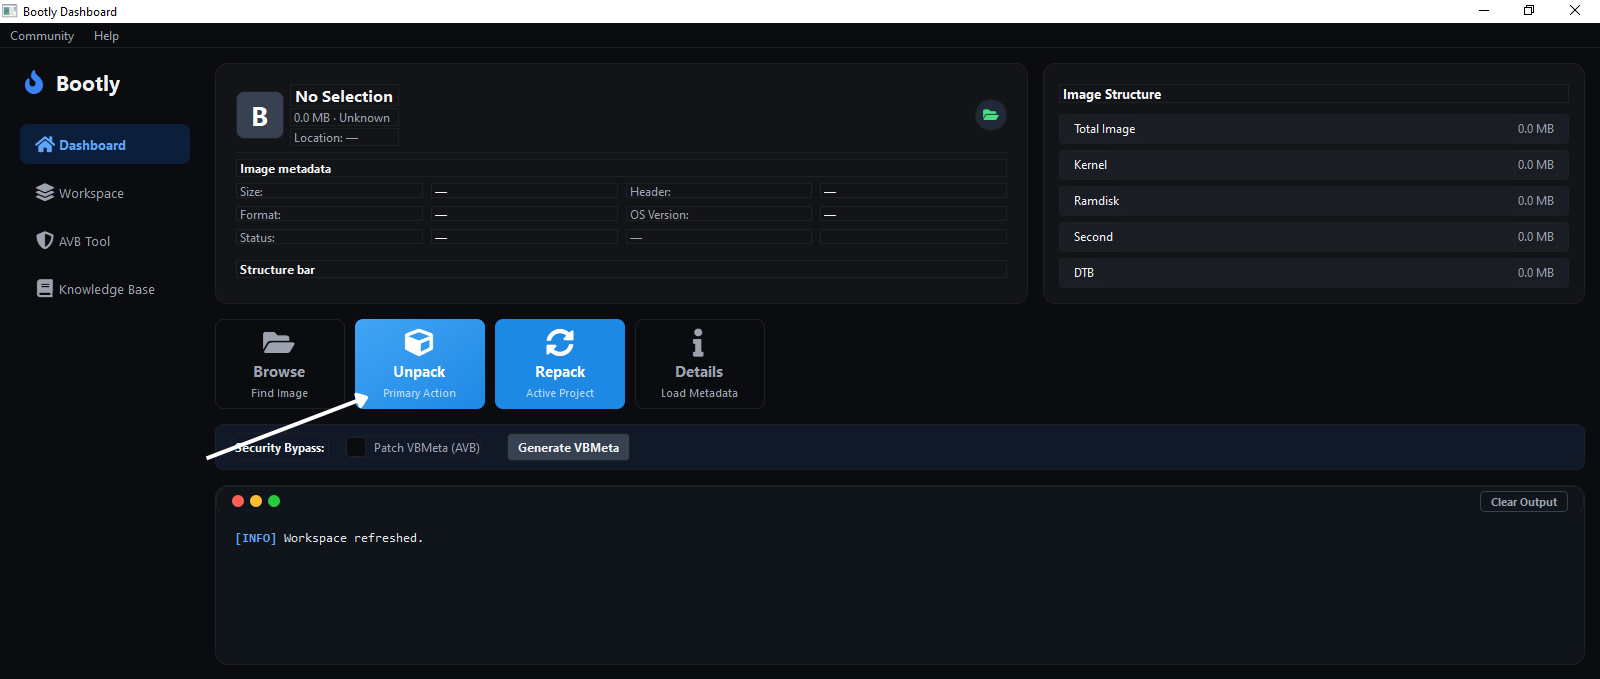
3. Unpack the Image
- Press the Unpack button to begin extracting the image contents.
- Once unpacking is complete, a popup will appear asking to open the folder where the image is extracted.
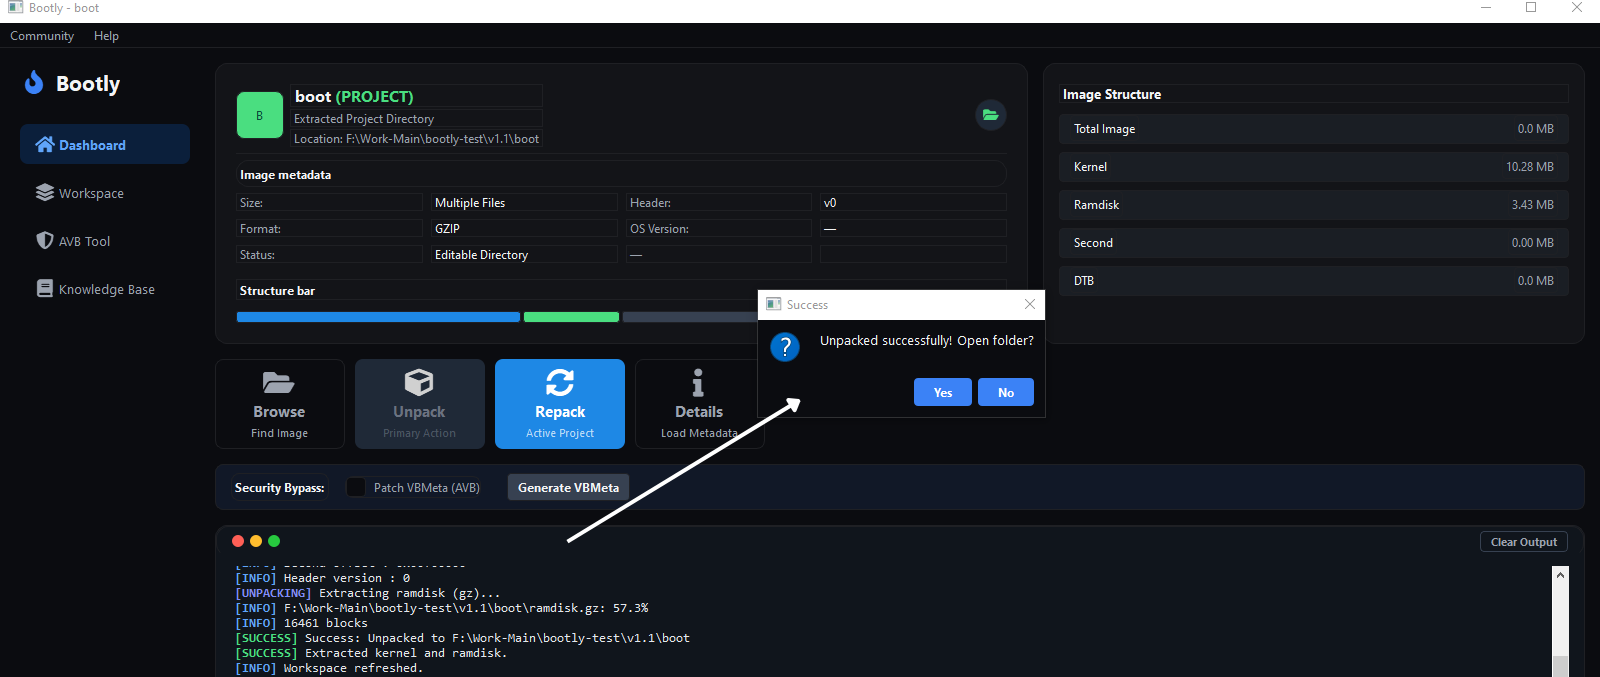
- Click Yes to open the extracted folder. You will also see the extracted image directory in the Workspace Explorer panel.
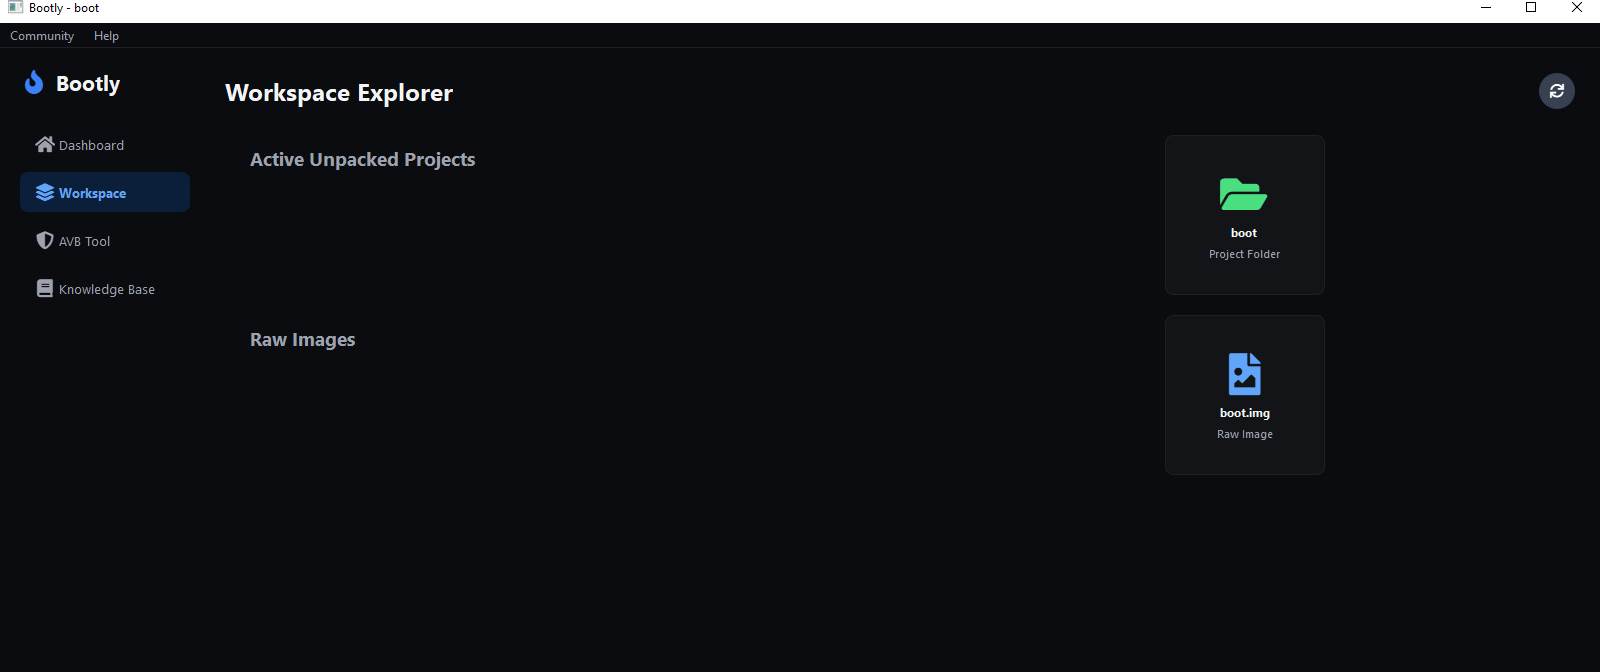
4. Modify Extracted Files
- The extracted folder now contains:
kernel- The kernel binaryramdisk- The ramdisk image- Other configuration files
- Open and modify any files as needed using your preferred text editor or tool.
Tip: Common modifications include:
- Editing
/init.rcfor system configurations- Modifying build.prop files
- Replacing kernel binaries
- Updating ramdisk components
5. Repack the Image
- After completing your modifications, go back to Bootly and press the Repack button.
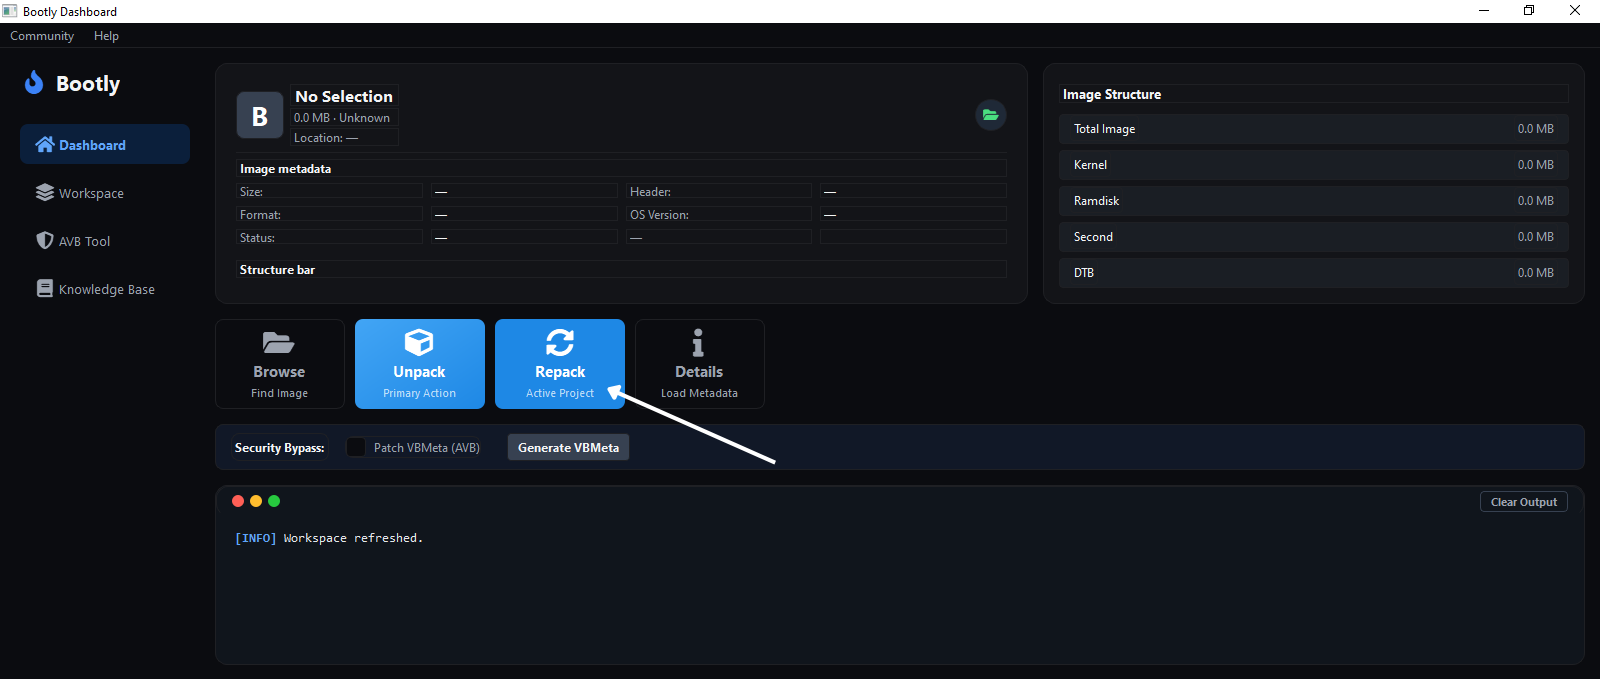
- A dialog box will appear prompting you to enter a filename for your modified image.
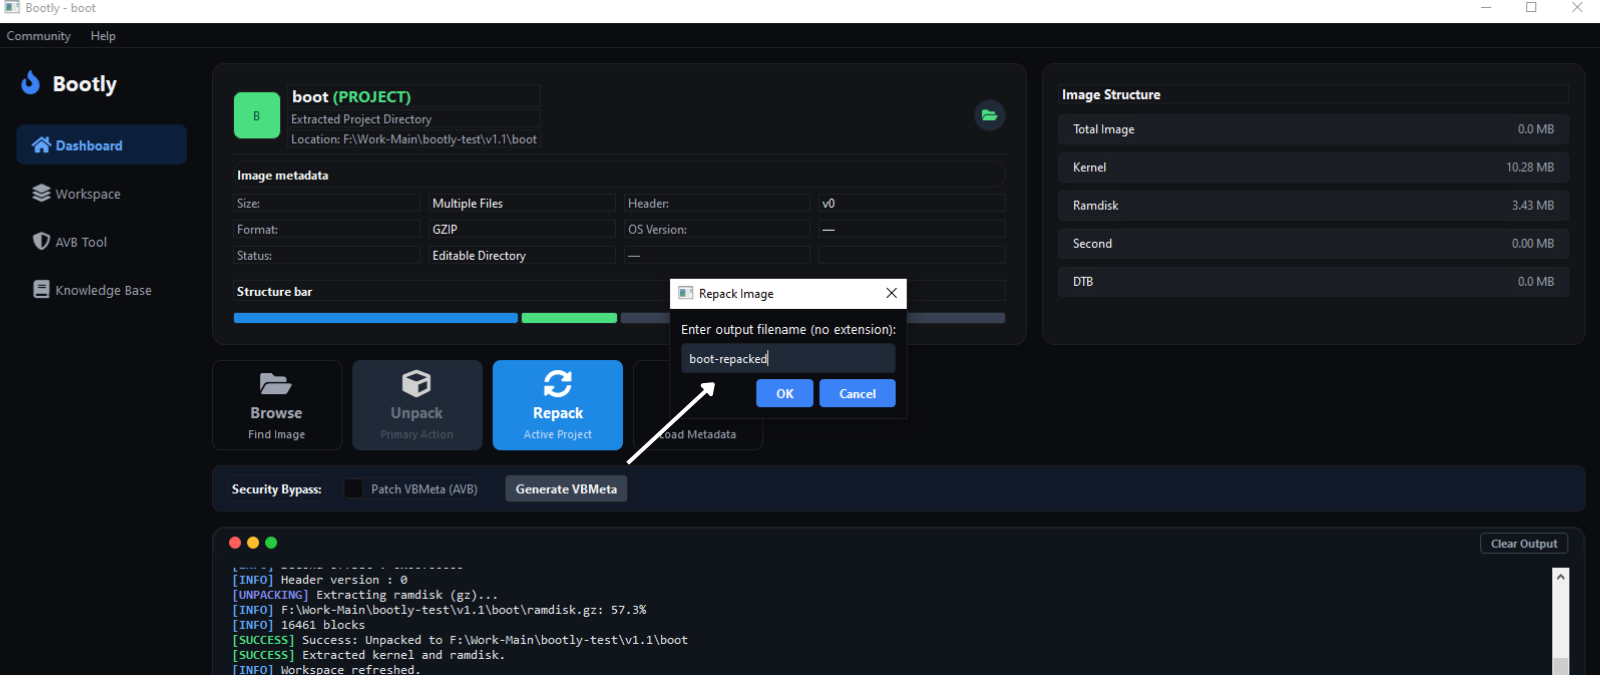
- Enter your desired filename make sure dont add .img bootly automatically add file extension (e.g.,
boot-repacked) and click OK.
6. Completion & Retrieve Your Image
- Bootly will begin repacking your image with the modifications. Once complete, a success popup will appear.
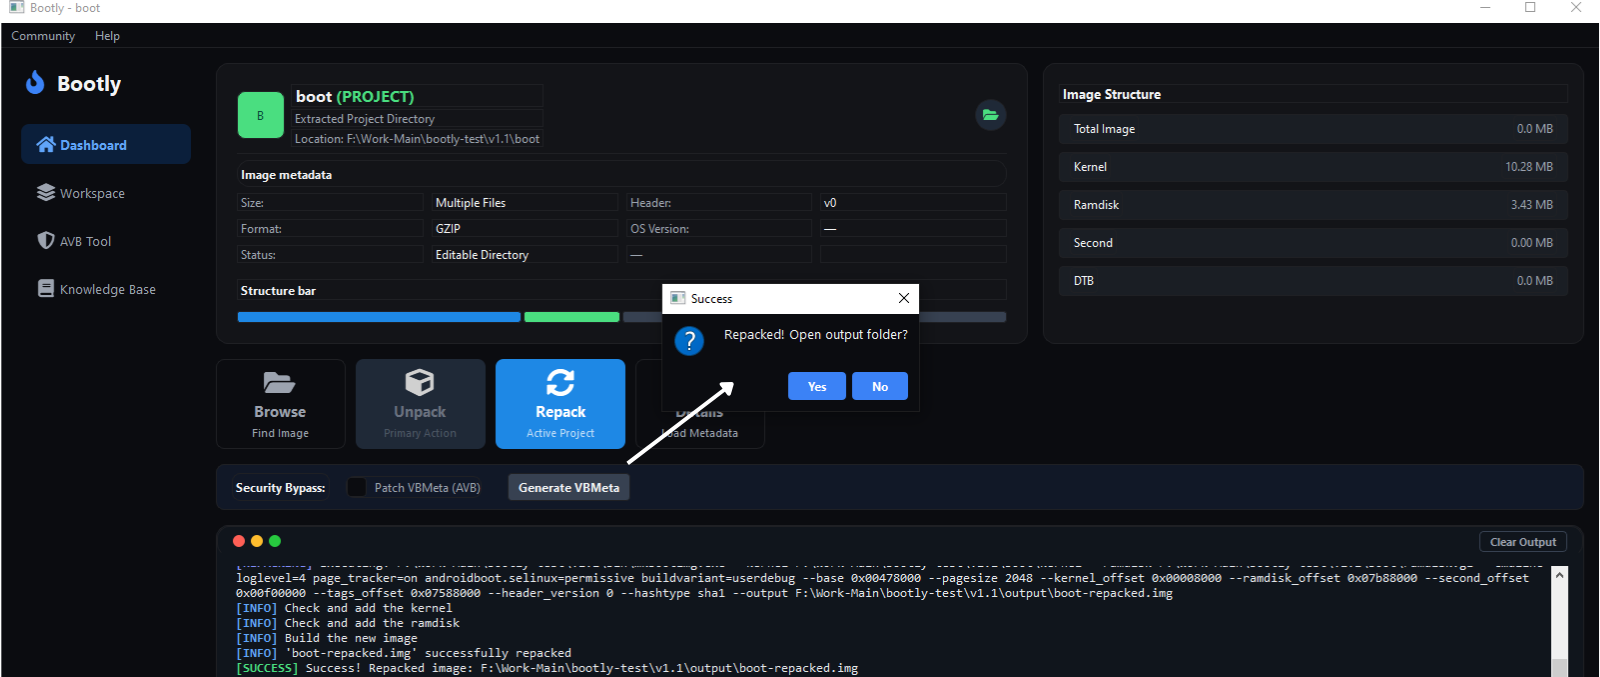
- Click Yes to open the
output/folder where your new repacked image is saved.
Summary Workflow
1. Launch Bootly
   ↓
2. Click Browse → Select your img file
   ↓
3. View image information
   ↓
4. Click Unpack
   ↓
5. Modify extracted files as needed
   ↓
6. Click Repack → Enter filename
   ↓
7. Retrieve your modified image from output folder
Troubleshooting
Common Issues
Q: “bin/ folder not found” error on Windows
- A: Ensure the
bin/folder is in the same directory asBootly-v1.1-windows-x64.exe. Do not separate them.
Q: Image fails to unpack
- A: Verify your image file is a valid boot.img or recovery.img. Corrupted files may fail to unpack.
Q: Repacked image not booting
- A: Double-check your modifications. Ensure critical files were not accidentally deleted or corrupted during editing.
Q: “Python not found” error
- A: Make sure Python 3.x is installed and added to your system PATH.
Resources
- Official Repository: Bootly on GitHub
- Report Issues: GitHub Issues
- Releases & Downloads: GitHub Releases
Bootly Community
Join the development community, share feedback, and collaborate with other Android modding developers:
Join Community: https://bootly.harislab.tech
Contributing
Bootly is an open-source project. We welcome contributions, bug reports, and suggestions!
Developed with  for the Android Community.